Support
Welcome to eSSETS Support. The page provides you with a key points of the main eSSETS functions. These are shown from left to right in the main menu at the top of each page. Click the green link for each function name to read more details about that function.
If you have questions or comments, please contact us at support@essets.com
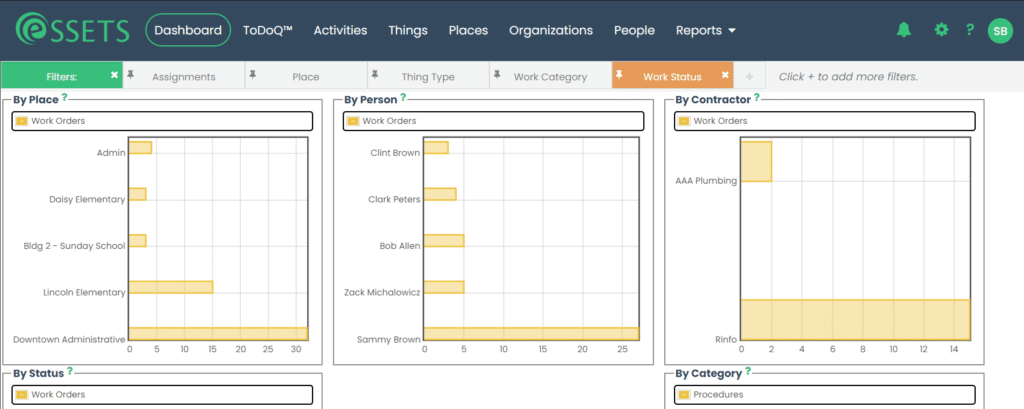
- The dashboard provides a quick graphical overview of work order status
- The layout of the dashboard is customizable
- Click on a graph to drill down to more details
- Use filters to show only the data you want.
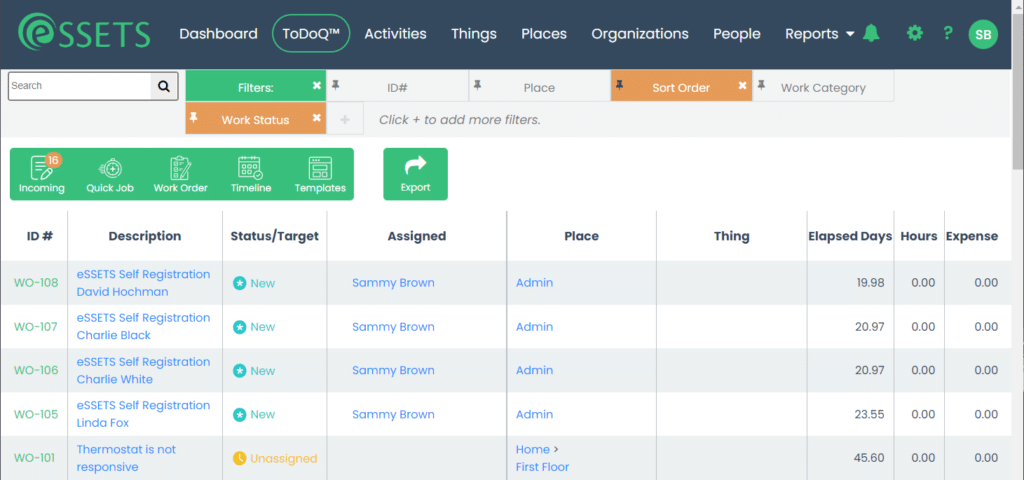
- The ToDoQ is a list of work orders
- For staff assignees, the list is prefiltered to include only their assignments.
- Click on a work order to open it, or create a new work order or quick job.
- Use filters to show only the data you want.
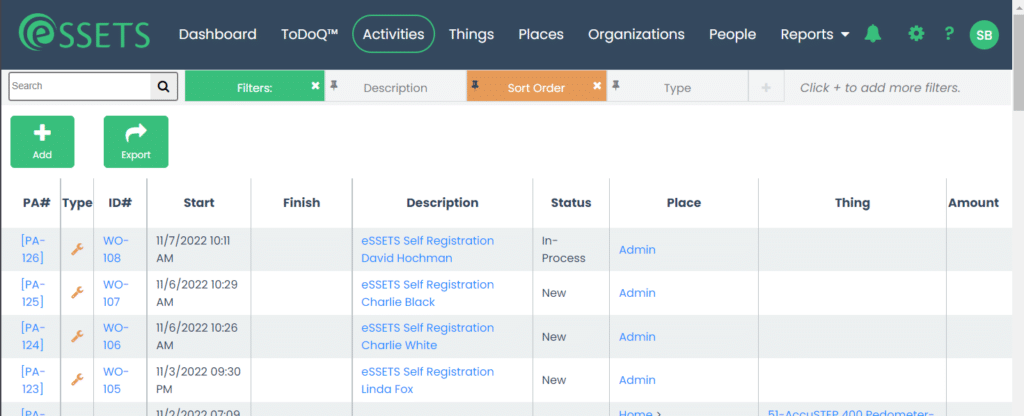
- Captures the majority of the information entered in the eSSETS app.
- Activities are about work, actions, information and money.
- Click on the icon in the Type column to see more information about an activity.
- Use filters to show only the data you want.
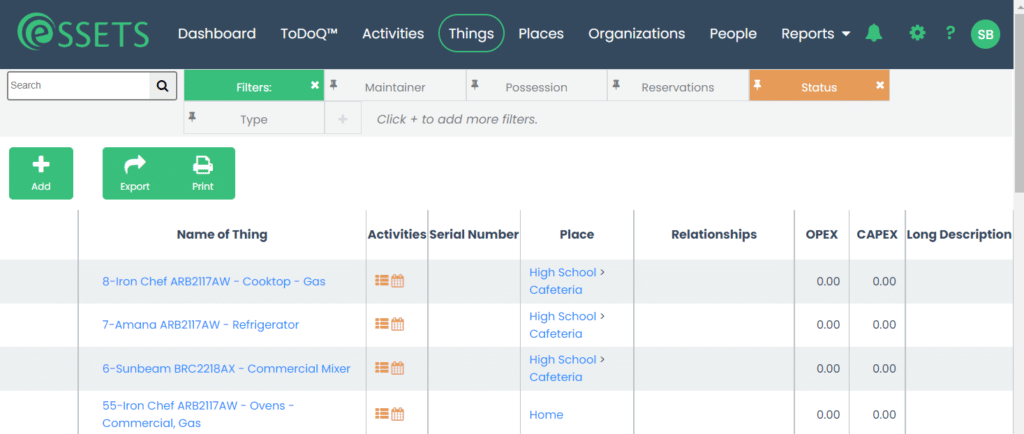
- Things are assets that are being tracked over their lifespan, such as equipment.
- Use this page to add new assets that you want to track.
- Click on the Name of Thing to see more information about it.
- Use filters to show only the data you want.
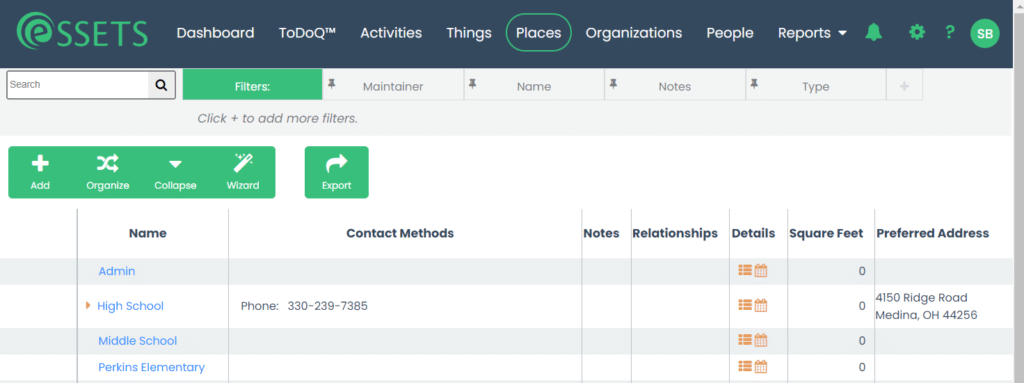
- Places are a hierarchy of locations. They can be physical locations, such as a building, or logical locations, such as a region in a company’s organizational structure.
- Places are shown as a hierarchy. As an example, there are floors within a building, rooms on each floor, and perhaps work spaces within large rooms.
- Use this page to add new places or change the place hierarchy.
- Click on the place name to see more information about it.
- Use filters to show only the data you want.
- Organizations are the vendors and contractors you deal with.
- Use this page to add new organizations or update an organization’s details.
- Click on the organization name to see more information about it.
- Use filters to show only the data you want.

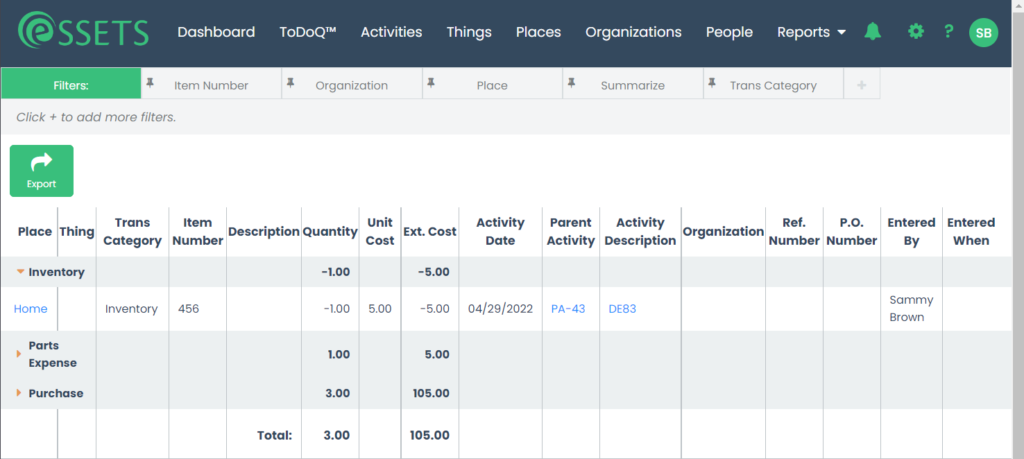
- People are those whom you deal with, either within your own organization or from others.
- Use this page to add new people or update a person’s details.
- Click on the name to see more information about them.
- Use filters to show only the data you want.
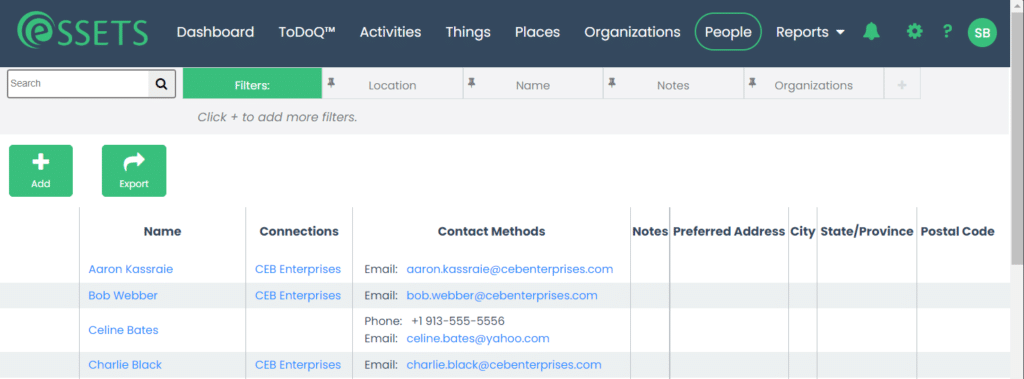
- This report shows how responsively work orders are being addressed.
- The standard report summarizes by work category since the beginning of last year.
- View the supporting data in detail or graphically.
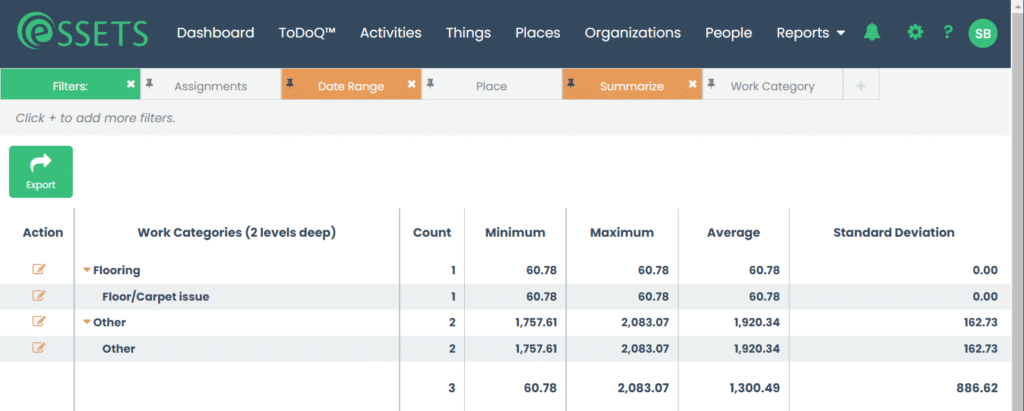
- This report shows both summarized and detail information about recorded financial transactions
- The standard report summarizes by transaction category since the beginning of last year.
- The CSV export provides the ability to perform spreadsheet analysis of transaction data.
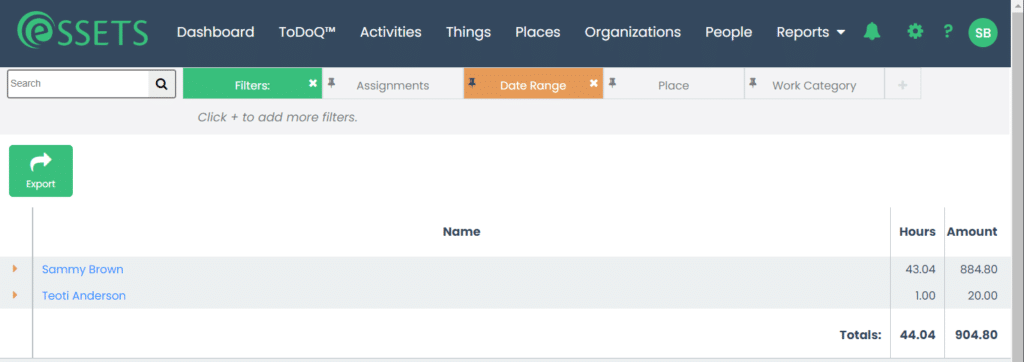
- The Labor Time report shows both summarized and detailed information about how much time staff logged for their tasks.
- The standard report summarizes by staff member during the prior week, which starts on Sunday.
- Use filters to show only the data you want.
- The Things Cost Summary report shows both summarized and detailed information about your assets.
- When exported, one can use the report for spreadsheet analysis to plan for assets that may be nearing end of life.
- The standard report summarizes by where each asset is located.
- Use filters to show only the data you want or to summarize differently.

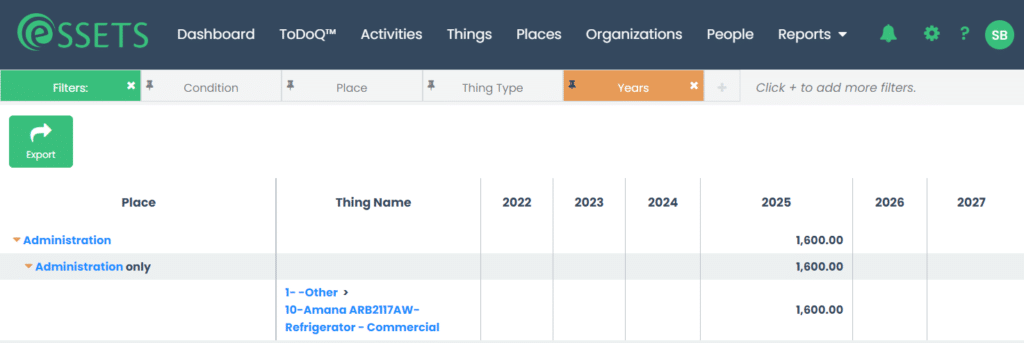
- The CAPEX Planning report shows a summary of assets with planned upcoming replacement.
- This report is useful when budgeting for capital expenditures.
- The standard report summarizes by where each asset is located and for the current and next five years.
- Use filters to show only the data you want.
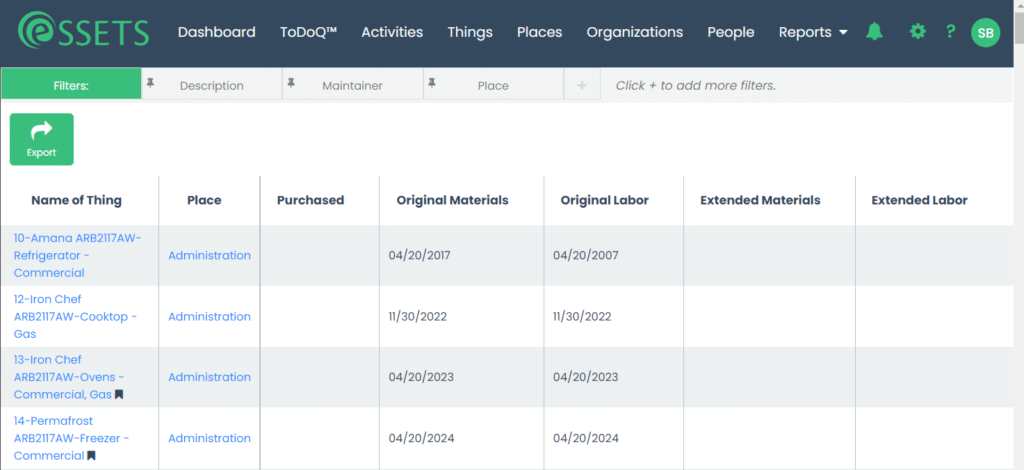
- The Warranties report shows a list of warranted assets.
- Those things with remaining warranties show a black flag after the thing’s name. Expired warranties have no flag.
- Use filters to show only the data you want.
- QR Code labels can be printed for a list of places or things.
- This allows one to tag locations or equipment for easing the entry of work orders or viewing maintenance history.
- QR Code label printing is available only for certain models of Zebra brand printers. Contact support@essets.com for help getting this started.
Things
Things are for just about anything you want to track and manage. Cars, trucks, machinery, heating, ventilation and air conditioning equipment (HVAC) computers, smartphones, tablets, printers, scanners, kitchen equipment, and so on. If you are new to asset tracking, we suggest using the 80/20 rule. Identify those 20% of Things that cause the most headaches and/or cost the most, and get them into Things first.
Things List View
The Things List View page displays a list of all, or a subset of, the Things in your asset portfolio. Things are listed in alphabetical order by the Name column. The name of a Thing is automatically assembled by combining the following*:
Asset ID>Brand>Model>Type of Thing.
*An exception is when an Alternate Name was given.
Filter Bar:
The second row of the page, just below the Menu bar, is called the Filter bar. In the above example the Name filter has been pinned to the filter bar. You can customize your filter by adding your favorite, most commonly used search criteria to the bar!
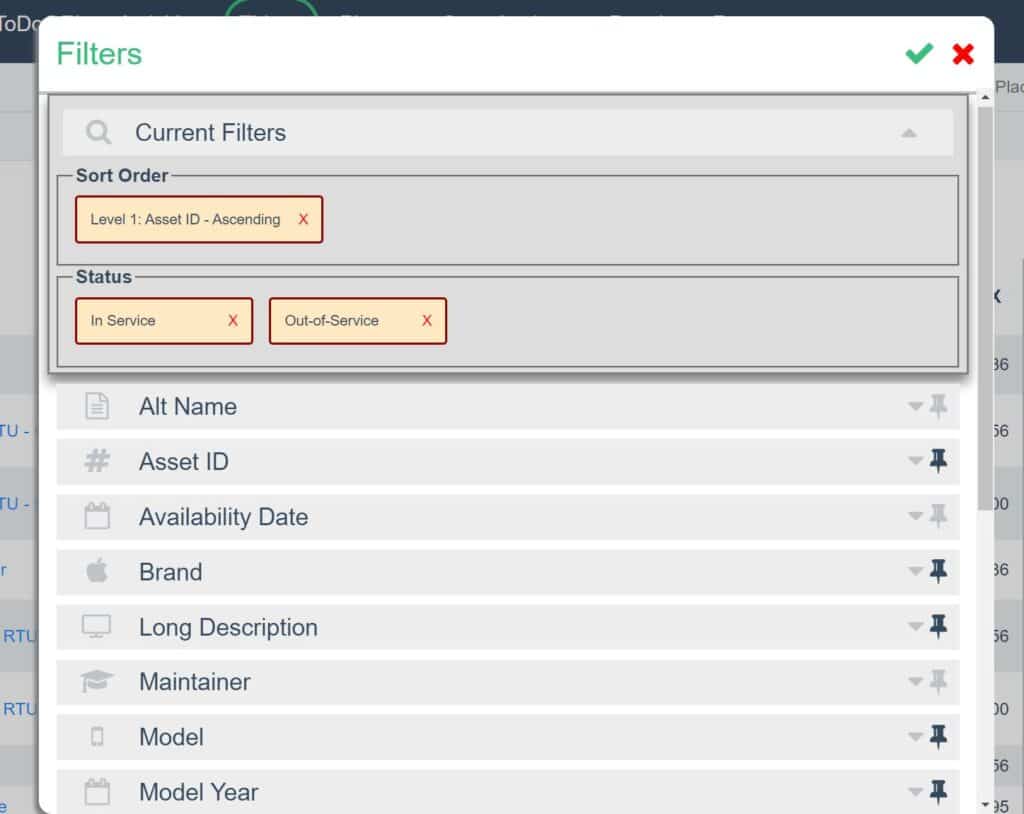
Filtering your list is a powerful tool to find a single Thing, or some subset of your overall asset portfolio. Any subset you select can be exported to a spreadsheet for further analysis by clicking the Export icon in the Action bar (just below the Filter bar).To use a filter, or add one to the Filter bar, click the + icon on the right side of the Filter bar. This will open the Filter selection dialog as shown.
Notice you have lots of search/selection options! You can use any of these at any time, but if you want to save time, you can pin the ones you used most often to the Filter bar. You do this by pointing and clicking the pushpin icon on the right side of the name. That changes the color of the pushpin from grey to black and adds it to the Filter bar when you close the dialog. In this example, the Asset ID, Brand, Long Description, Model and Model Year filters have been “pinned.”
To remove a filter from the Filter bar you can open the Filter dialog and click the pushpin changing it from black to grey. You can remove a filter directly from the bar by just clicking the pushpin in front of the filter name.
Thing Types
The app needs to know what Type of Thing you are recording in order to know what questions to ask and what information to present on the page for your input. For example, a clothes washer is a different animal than a solar panel. They can have different attributes.
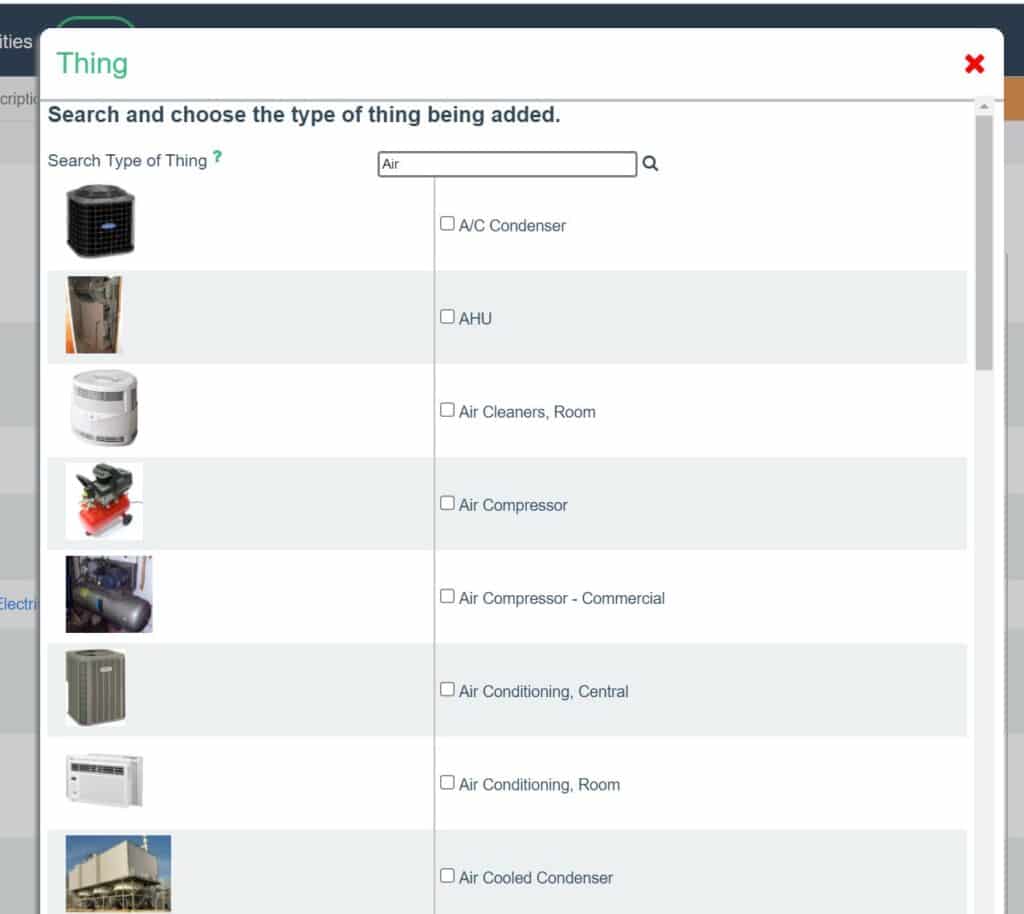
Enter a portion of the Thing Type into the search box to find items in the system. You should type in the word or phrase representing what this type of Thing is most commonly called. In the example below, we have typed in the word “Air” and clicked the enter key or the click the search icon. If you find the Thing Type you’re looking for, click the checkbox in front of the name. If you don’t find a good match in the selection list, just key the Type name you want to use and select “Other Type” on the list.
HINT: Start with a broad search term. For example, HVAC will bring up rooftop units, room air conditioners, furnaces, and air handlers. Select the closest match. For example, a search using “Computer” will bring up Desktop, Notebook, All-in-one, Server, and yes, Computer.
Add or Change a Thing
Basic Info – This first section is expanded when the dialog box first opens. You can enter or change the info in most of the fields on the form.
Some items will have a ? after the label. You can hover your mouse over this question mark for an explanation of the item. In this example we have selected an existing Thing from the Things List View. The Thing edit dialog initially displays in view-only mode. Administrators have the option of clicking the Edit button in the bottom left of each section to switch to edit mode. After doing so, the button label changes from Edit to Save.
Type of Thing – is very important because it affects the information that is available for viewing, input or editing on the rest of this page. Changing the Type of Thing will result in a warning dialog that some data might be lost. For example, the specifications for a vehicle are quite different than those on a rooftop HVAC unit. Therefore, once a Thing has been setup, it will be very rare that you will change its Type. The exception is if it was originally set-up as the generic “Other”, and eSSETS has since added a specific Thing type, you will want to change it from “Other” to the new Type.
Brand and Model – These are useful for searching, filtering and reporting.
Asset ID – An ID # is automatically assigned as Things are added. The next ID# is set in the Account Settings page. The ID # can be overridden. If your company uses a fixed asset accounting system, you may wish to use the ID # from that system.
Alternate Name – By default, the Asset ID, Brand, Model and Type are used as the Thing name throughout the application. If you prefer a different naming convention, you can use this field to override the default name. For example, the default name for the Thing in the sample page may be “1001-Kohler 30REOZK4 (Generator)”.You can call it Gen 1, or you can call it Fred, or anything else you want.
Serial Number – This is not required, but it is highly recommended that you enter the serial number, at least for new acquisitions. Serial numbers can be important for warranty claims, and sometimes for identifying the correct replacement parts.
Long Description – Use this to provide a detailed description of the Thing. Use keywords that will facilitate searching. Tip: Go to a shopping site that carries the Brand and Model of the Thing and copy and paste selected info from the product description.
Product Manual Link – This allows insertion of a URL pointing to online reference material about this Thing. Many manufacturers have Operation & Maintenance manuals available from their websites. Using this resource allows these manuals to be retrieved with one click.
Place – A Place selection is required. Clicking the Choose Place button will allow selection of, or changes to the Place. A dialog box will be displayed showing the Places tree hierarchy.
Model Year – This is for reference only, when applicable. While model year can be important for some types of assets, like vehicles for example, it may not be important for many others. For the latter case, we recommend just plugging in the year it was purchased.
Relationships
Parent Thing – If the Thing being set-up is a component of a system, then clicking the Change Parent button allows searching and selecting the associated system Thing from a list.
Children Things – A Thing can have one or more Children Things. For example, an engine could be a child of a vehicle. A compressor could be a child of an AC Condensing Unit.
Possession – Sometimes staff members or contractors are issued company assets such as tools, computers, and vehicles. You can track these possession transfers in the application by creating a Transfer Activity, which allows entry of the date/time the asset was transferred to their possession.
Maintainer – Primary users (not Requesters) can be designated as the responsible person for a Thing. A Contractor Organization can also be designated as a Maintainer. An Action List item can be configured to notify this person or Organization if an observed condition is outside of a defined tolerance level.
Attachments
You can upload a picture to replace the generic image based on the Thing Type with an actual picture from your mobile device, or a picture captured from a website. The first image uploaded will become the one displayed on list views. You can also upload multiple images or documents, such as pictures from different angles or supporting maintenance documentation. To upload an image, click on the Select Files button. This will launch a file selection dialog box. Clicking on the image will download the image or document. The type of file will determine which program is launched for viewing.
Tip: Clicking on Add File from a Smartphone or Tablet will give you the option to take a picture or browse your file system for an image.
Cost
The Cost section can vary depending upon whether your company uses eSSETS for managing depreciation calculations.
- CAPEX– This is an abbreviation for Capital Expenditure and is a view-only summary of all life-to-date Transactions to Category types of “Fixed Assets.” This is the capitalized cost of the asset, so it will not include maintenance expenses.
- OPEX – This is an abbreviation for Operating Expenditures and is a view-only summary of all expense type Transactions.
- Depreciate – If yes, then straight-line depreciation transactions will be generated and summarized below under LTD (life-to-date) Depreciation. If no, then some fields described below will not appear.
- Useful Life – Generally, this will be the number of months based upon the depreciation accounting rules used by your company. If depreciation is not being used, this information is just for reference.
- Depreciation Start Date – This identifies the month when depreciation transactions begin. For most organizations, this will be the month the asset was purchased.
- Salvage Value – This is the assumed value of the asset when it reaches the end of its useful life. This is subtracted from CAPEX as the cost basis for depreciation transactions.
- Depreciation Cost Basis – Calculated as CAPEX less Salvage Value
- LTD Depreciation – LTD means Life to Date. This is the sum of all depreciation transactions during the life of the asset.
- Net Book Value – Calculated as Depreciation Cost Basis less LTD Depreciation.
- Fair Market Value – This is the current estimated value of the asset if it was sold.
- Replacement Cost – This is the estimated cost to replace this asset when it reaches the end of its useful life. This amount is used on the CAPEX Planning Report.
- Replacement Target Year – This is an estimate for capital budgeting planning purposes. This is the year used on the CAPEX Planning Report.
Ratings & Readings
The Ratings and Readings section can contain different information for different Types of Things. This example is from a generator. Because generators generally have an hour meter, the last Hour Meter reading and Reading Date are displayed. These are view-only because they are updated automatically from Action Lists.
If this were a vehicle, it would show Odometer Reading instead of Hour Meter. The Condition rating and date is shown for all Thing types. It is view-only because it is updated automatically from Action Lists.
Warranty
The recommended practice is to fill in these warranty expiration dates (and depending on Thing type, odometer or hour meter readings) whenever new assets are acquired. Warranty expiration date range selections are available on the Warranty Report, which lists Things with their expiration dates. It is also recommended that any nuances about the manufacturer’s warranty policies be included in the Warranty Notes section.
Specifications
The contents of the expanded version of this section are highly dependent on the Thing Type (i.e. a diesel generator has a very different set of specs than a dishwasher). eSSETS periodically updates the Specifications for different Thing Types.
Organizations
Overview
Organizations are any entity you interact with to aquire, support, maintain, or use Places and Things. Examples include:
- Contractors – service providers, like HVAC, Electrical, and Plumbing contractors
- Suppliers of parts and materials
- Suppliers of equipment (fixed assets)
- IT Service Providers
- Utility companies – guess that’s a type of material—fuel
- Lessors – if you don’t own your Places, you probably rent or lease
- Government agencies – like building inspectors
- Architects, Engineers, General Contractors (AEC)
- Customers – if you provide facilities services, you have customers. If you lease or sublease space, you have customers.
The only information that is required to create an Organization is a name. However, we recommend you record all you know about this entity, such as:
Notes – Use Keywords that identify trade, skills, etc. In other words, identify why this entity is in your organization list. You can use the Notes Filter to search on these keywords!
- We recommend starting with the type of Organization (see above list) and follow with the trade or skill. Examples:
- Contractor: HVAC
- Contractor: Plumbing
- Supplier: lighting
- Supplier: lumber
- Utility: gas
- Utility: electric
- We recommend starting with the type of Organization (see above list) and follow with the trade or skill. Examples:
- Contact Methods
- email (company level email—not to be confused with individual email. An example is support@essets.com)
- Phone
- Fax
- Websites
- People – There may be one or more people you work with at this organization. It’s good to identify who they are.
- Addresses
- Physical Addresses
- Mailing Address
- Attachments – such as a copy of their business license, insurance certificate, or other qualifying documentation.
Assigning Jobs to Contractors
In order to assign a job to a contractor electronically through ToDoQ, you need the Organization name and a primary email address. In some cases, this might be the owner’s email address, which might be duplicated under people. The important thing to note is that the primary email address of the Organization is what will be used for Service Request and Action List assignments.
People
Types of People
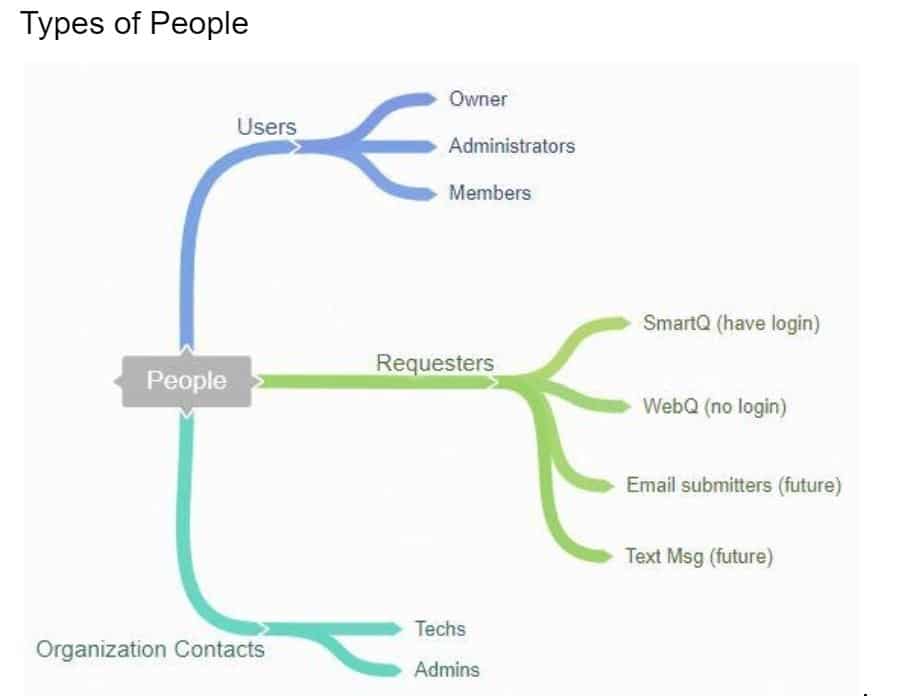
This illustration shows the different types of People that can appear in the People list view.
The top branch shows the types of “Primary Users” which can be managed on the Account Settings menu by the Account Owner or by Administrators. The middle branch shows SmartQ Requesters. Since SmartQ Requesters have a login, their permissions are also managed through Account Settings.
Primary Users and SmartQ Requesters
Primary users (Owners, Administrators, Members) and SmartQ Requesters are added and changed through Settings>Account Users. Since the list of Primary Users and SmartQ Requesters can get long, there are multiple filters available on the Account Users page. Owners and Administrators can also get to User permission control information through the People List accessible from the main menu.
In the example, the Name filter has been pinned to the Filter bar. This allows you to search for a person by name with one click. Notice that clicking the + icon to the right of the Name filter will open the Filter dialog box (see below) where you can apply other search/selection filters, or pin other filters to the Filter bar.
Requesters
There are two types of Requesters: those with logins to SmartQ, and those without logins. Any person that has the WebQ URL can become a Requester. Also, any person added through New Service Request from ToDoQ, or by clicking the Add Person button at the top of the People List View will also go into the People List as a Requester.
Clicking a name from the People list, or for that matter from any screen where you see a person’s name, will open the People dialog, as shown. There are several sections within this dialog that can be opened to display additional information.
Organizations and People
A person can have multiple Organization affiliations. See the Organiztions topic for a discussion of the various types of entities. Knowing key contacts at your contractors and material suppliers can be handy. You can associate a person with an Organization from this section of the People dialog, or you can associate a person to an Organization through the Organization dialog. Either way, you can identify their title or role.

How to Merge Duplicate People
Over time, people’s names can be duplicated. The most common cause for duplicates are from WebQ requests. Any variation in spelling of the name or contact info will result in another person being added to the People list.. Periodically, it’s a good idea to clean up the People list by merging the duplicates.
- Go to People on the main menu bar.
- Scan the list.
- When you see two or more names that are really the same person, pick the one from the list that appears to have the most complete and accurate information and click on the name to open the People dialog.
- In the dialog header, click the Merge icon, which is just to the left of the red X.
- If there is just one exact match, then click the green check mark in the dialog header and this will complete the merge and return you to the People dialog.
- From the People dialog, make any editing changes needed.
- Closing the dialog will refresh the People list.
Activities
Overview
Activities are about work, actions, information and money. The Activities List view allows you to see a list of current and historical activities. There are numerous filters available, and the list can be sorted in different ways. By default, the list shows in the newest to the oldest sequence.
Parent Activities
Parent Activities (PA’s) are a useful way of grouping together related Activity Types. Every Activity has a Parent Activity ID, or PA Number. A PA can have one or more children of various types.
Types of Activities include:
- Services Requests
- Action Lists
- Notes
- Transactions – Financial
- Attachments – Documents, pictures, videos
- Transfers – Used to transfer possession of a Thing or Place to a Person or Organization
- Reservations – Used to reserve Places or Things for a Person or Organization in the future
[insert chart from slide 31]
This chart illustrates the concept of a Parent Activity grouping together multiple activity types to form a complete picture of job cost, explanations and document references.
- An inspection handled through an Action List (AL) has been configured to trigger Service Request (SR) follow-up to an “out of tolerance” condition.
- The SR is assigned to both an internal staff member and an outside contractor (service provider) to help complete the job.
- Staff member records his/her time on the SR which automatically creates labor cost transactions.
- The Service provider sends an invoice. When the invoice is received a Transaction is entered through Activities>Transactions to record the cost to appropriate expense categories.
- A copy of the vendor’s invoice is uploaded as an Attachment for reference.
A text Note is entered to explain why the Service Provider was engaged to help with the work.
Activities – Lifecycle Records
The Activities List View provides full lifecycle information about Places and Things. You may arrive on this page from the main menu, or you may arrive at a filtered view if you are coming from other pages, like the Thing page or the Places dialog. You can also create Activities from this page. Examples of what you can do from this very powerful page include:
- Complete lifecycle history of a Place or Thing
- All Activities that have occurred within a selected date range
- All Activities within a selected date range for a selected Place
- All Activities within a selected date range for a selected Thing
- All Activities involving a selected User
- All Activities associated with selected Types of Things
- Details about a selected Parent Activity and all of its children (see Activity Types below)
- Filtered list of Activities by Activity Type
- Filtered list of Activities involving selected Vendors
- An almost unlimited number of filtering combinations
- Add new Parent Activity and one or more children Activity Types (except for an Action List)
It should be noted that there can only be ONE Action list (AL) per PA. All of the other Types can have multiples. The reason there can only be a single Action List per Parent Activity is because AL’s are automatically generated by the scheduler. Additionally, Notes and Attachments at the Parent Activity level are independent Activity Types. While Service Requests and Action Lists can have their own Notes and Attachments, these are “children” of the SR or AL and are down a level from the Parent Activity. Thus, to see the Notes on an SR, you must drill down to the SR. Transactions are different in that any time money is spent, either through parts or labor time emanating from SR’s or AL’s, Transaction entries are created and visible under the Parent Activity.
Transactions
The basis for financial inputs and reporting is through Transactions. Transactions originate from:
- Automatically generated from Service Requests and Actions Lists
- Parts and Materials used on the job
- Labor time recorded on the job
- Automatically generated depreciation transactions, if the Depreciation option is included in your subscription
- Manually entered through Activities>Transactions
Examples of manually entered Transactions include:
- Purchases of Fixed (aka Long Term) Assets
- Purchases of parts & materials for inventory
- Utility bills
Transactions are used for reporting on:
- Transaction Report – available on the Reports menu
- Things Cost Report – available on the Reports menu
- Thing dialog – in the Cost section
- Activities List
How to enter Transactions
First, go to Activities from the main menu, and click the Add New button. This action results in the following screen:
Provide a short description (such as purchase parts, purchase equipment, utility bill, etc.), then click the Transaction button (highlighted above). A sample Transaction entry page is shown below:
Here are some recommendations and best practices:
- Activity Date – if you enter month and day only, it will default to the current year. In the above example only “5/2” was entered.
- Organization – In the purchasing example, this is for the vendor name. If the vendor is not already in the Organization list, then you can add a new one from here.
- Trans Category – Under the Transaction Details section, the Transaction Category is a drop down selection. These categories are set up and maintained from the Account Settings menu.
- Item Number – We recommend using your own item number rather than the supplier’s item (catalog) number. This will allow you to track usage independent of the source of supply.
- What is this for? – Every Transaction Detail line must be associated with either a Place or a Thing. This is used for cost reporting.
Note: A Transaction can have multiple Line Items, as would generally correspond to a vendor invoice. The “Copy Last Line” button can be a time saver if you have multiple similar line items on the invoice.
Transfers & Reservations
Reservations allow a Place (like a conference room), or a Thing (like a projector) to be reserved to a person or Organization for a planned time range.
Transfers signifies a transfer of possession of a Place or Thing to a person or Organization. For example, when a staff member is issued a Notebook computer or a Smartphone (Thing transfer) or when a staff member is assigned an office (Place transfer).
A Reservation can be changed into a Transfer, in which case the planned start date and time in the reservation can be changed to the actual date/time. Example: Bill reserved the projector for Monday from noon to 5pm. He picked it up at 1pm Monday, but didn’t return it until 10am on Wednesday. The transfer Activity history will show the actual time from check-out to check-in.
A Transfer can stand alone.
- Example 1: a new MacBook Air is issued to Sally when she started work. It will show in Sally’s possession until she returns it.
- Example 2: You lease a spare office to ABC Consulting on 11/1/2017. You use the transfer function to show ABC Consulting (an Organization) as a Lessee of the Place.
Reports
Service Level Analysis
Overview
This is a performance report that helps managers analyze the duration of time between the time requests are submitted and its fulfillment. The report has different “summarize” options, which are similar to pivot tables in spreadsheets. It essentially allows managers to look at the data from different angles. Examples include:
- Summary by Work Categories
- Summary by Place
The summarize-by options combined with the filter options make this a powerful analysis tool!
Date Range – The report defaults to one year of history from the current date. You can override this and select any date range you like by using the range selector fields at the top of the page. Please be advised that going back multiple years may have an impact on the speed of the report.
Summarize button – The report defaults to Request Categories 2 levels deep. This means the report initially displays with one row for each unique Request Category. Clicking the + in front of the Category name will expand to show sub-categories of that parent. The real power of this report is its ability to slice and dice historical data along multiple dimensions. You can summarize by Place and then Category, or Category and then Place. Or you might elect to summarize by a single dimension, such as Place.
Report Columns
However you choose to summarize, the numbers will be refreshed to show the performance characteristics of your selections. The columns are:
- Count – how many Service Requests (SR’s) were completed during the selected time range
- Minimum – what was the minimum elapsed time between the request date/time and the completion date/time.
- Maximum – what was the longest duration of time between request date and request completion.
- Average – what was the average time it took to complete the jobs.
- Standard Deviation – in brief, this number indicates the level of spread within the data. Use this number (SD) with a plus or minus from the average where:
- -68% of the time the job was completed within +/- 1SD
- -95% of the time the job was completed within +/- 2SD
- -99.7% of the time the job was completed within +/- 3SD
A simple example: If the Average for an HVAC job was 10 days, and the SD was 2 days, then 95% of the time the job was completed between 6 and 14 days.
Drilling Down
The report provides multiple levels of drill down. As an example, below we’ve clicked the + in front of HVAC to show its sub-categories:
Now, if we click on the Action row on any HVAC sub-categories, we can select the chart below.
Clicking on any of the bars within the bar chart will produce a grid showing the underlying data with the SR’s sorted in descending sequence of elapsed days. The intent here is to give you a quick reference to the outliers that hurt your overall performance within the selected category (i.e. what HVAC – Mechanical issue took us 483 days to complete?). The drill down can take you all the way to the individual service request that took the longest to complete.
Charts
To help visualize the numbers, you can click in the action column to the left of any row and select the Chart option. Please note that the level of indentation where you click on Action affects the chart that is presented. Here is an example of a chart done at the top level of Request Category.
It’s important to note that the higher the count (number of occurrences), then the higher the reliability of the probabilities.
Please note that this is a simplified explanation of standard deviation which assumes a “normal distribution” of the data. We’ll defer a more in-depth discussion of this topic to a future blog article with some guest contributors to elaborate.
Transactions Analysis
This report is for analyzing where money is spent. Like the Service Level Analysis Report, it has summarize options and numerous filter options. This helps managers analyze where and how money was spent.
This is a powerful report that allows financial pivot summaries across multiple dimensions. You have to experiment with this report to appreciate the power. Let’s start with some of the questions this report can answer for you:
- How much has been spent on maintenance on building A over the past _________(month, quarter, year(s))?
- How much has been spent on maintenance on the second floor of building A over the past ______?
- How much has been spent on the roof of building A over the past _________?
- How much has been spent on Rooftop Unit 1, on building A over the past ______?
- How much has been spent on all Rooftop Units on building A over the past ______?
- What exactly did we do to Rooftop Unit 3 this year that cost $12,000?
- What was our total spend on fixed assets across all buildings, all locations, over the past _____?
From the above, you can see the patterns. You can filter and/or summarize Transactions based on:
- Date Range
- Places
- Things
- Transaction Categories
- CAPEX
- OPEX
- Individual Categories
- Organizations
- Item Numbers
- Jobs (Parent Activities)
You can also drill down from summary level to supporting details, to the original source transaction (Service Request, Action List, Purchases)
Labor Time
Time is money. When staff members work on jobs, they are spending money. For the Transaction Analysis report to be meaningful, and the OPEX (Operating Expenditures) costs on Things to be meaningful, workers need to log their time. We strongly recommend that managers view the Labor Time report weekly to ensure that staff members are logging their time on jobs.
By default, this report plugs the date range to the last week ending on the previous Saturday. You can override this date range filter by selecting any from and to date range. The report lists one row for each staff member who recorded time during the selected date range. The hours worked for that employee are multiplied times the labor rate stored in the User profile. In addition to Date Range, the report has other filter options as displayed below.
Things Cost Summary
This report has multiple “summarize by” options, and allows you to drill down to the details of individual Things. It includes All cost factors:
- Acquisition Cost
- Salvage Value
- Fair Market Value
- Replacement Cost
- Replacement Year (target replacement year)
- Useful Life (estimated useful life in months)
- LTD (Life to Date) Depreciation
- Book Value
- OPEX – operating expenditures, which is essentially life to date maintenance costs
CAPEX Planning
This report is for Capital Budgeting Planning. When you meet with your CFO, having this report handy for the meeting can help you justify replacing assets that are costing more to maintain than they are worth.
The report is summarized by the top level of the Places hierarchy and allows drilling down the hierarchy all the way to the individual Things.
The report allows for selection of a range of future target replacement years, and provides filter options including:
- Brand
- Model
- Condition
- Place
- Thing Type
Warranties
Want to know what warranties are expiring next month? Go to this report, select the Date Range filter, and select next month.
QR Code Labels
This is not really a report, but you use this option to print QR Code Labels for a selection of Places or Things.
Note: You need a QR Code Label printer for this. Contact support@essets.com for currently supported printer brands and models.
Settings
In the black menu bar, in the top right hand corner of every page, is a gear icon. If you are an Owner or Administrator, clicking this gear will take you to the Settings menu. Only Owners and Administrators have access to the full menu. Non-administrators will see the gear, but when they click it they will be taken to their Personal Settings
Action Lists
Action Lists are for Checklists that can be used for Preventive Maintenance tasks or Inspections. Action Lists are like templates defined by an eSSETS Administrator for recurring jobs. An Action List is a collection of Action Items. There are two menu options on the settings drop down for Action Lists. The first one is Action List Setup, which defines the items (rows) that are on the checklist, and Action List Scheduler that defines the recurrence rules for when Action Lists are generated to ToDoQ.
Action List Setup.
You can set up your own Action Lists from scratch, or to save time and wear and tear on your keyboard, browse the library of templates, find something close, and then modify it to fit your needs
Action List Scheduler
Where the Action List defines the checklist template, the Scheduler defines the rules for triggering a job to ToDoQ. These triggering rules use time ranges and/or usage attributes.
Account Settings
This page defines some options for customizing the application for your use, including:
- Your Organizations’s Name
- Your Logo
- Various options (which will change from time to time with new software releases)
- Contractor Instructions that are included in email notifications to contractor job assignments.
Account Users
This option is for adding new users, or changing the permissions of existing users. Below is an example of Account Users page when the menu option is clicked:
There are three basic types of users:
- Owner – can add or change any other type of user
- Administrator – can add or change other Administrators or Members (but not Owners)
- Member – cannot add or change other users; they will not have access to the Settings menu to get to Account Users. Also, cannot edit Places, Things, Organizations or People.
Adding Users
After clicking the Add User button, you will be taken to a new page where you can fill in the user’s name and email address. After clicking Save on the screen, the page expands, as shown allowing you to optionally identify to whom this user reports (manager).
Control User Permissions
You can also limit the scope of access this user has using the Places hierarchy and/or Thing Types. For example, if you have a location (branch) manager, you may wish to eliminate the noise of all other locations so they only see stuff related to their own branch. If you have a district manager over several branches, you can limit their access to the branches in their district.
You do this by clicking the + in front of Places to expand the list.
The other changes you can make on the page below are to enter a presumed hourly labor rate for the person. This is used for job costing. Most accounts will choose to use an average fully burdened labor rate (ask your accounting department about this) instead of the actual pay rate for the person.
The screenshot below illustrates how you can expand the Places section under Access Rights to limit a user’s access. In this example, Ed will not see Complex B, PS Riverside, or PS Irvine because the checkbox in front of those Places names have been removed.
CSV Data Import & Update
CSV are comma delimited files that can be created by Excel or other tools for bulk uploading of data into eSSETS. We recommend contacting support@essets.com for assistance in using this functionality. Once you’ve done a few, it’s pretty straightforward, but the first ones can be a bit frustrating.
Work Categories
Work Categories are used for classifying the different types of work performed on work orders (Service Requests). There are categories and subcategories which are used in management reporting, such as for the Service Level Analysis Report. Requesters and dispatchers will see the subcategories to select from in drop down lists. We recommend keeping the list as short as you can, but still provide for meaningful classifications.
SmartQ Setup
This setup option allows administrators to create or change the instructions to users when they login, and to select the logo that appears at the top of the SmartQ forms.
WebQ Setup
This setup option allows administrators to create or change the instructions to users when they click on the WebQ URL, and to select the logo that appears at the top of the WebQ request form..
Other Drop Down Lists
While the options on this page may change with new versions of eSSETS, at the time of this writing it includes:
- Hold Reason – as in a list of reasons that a Service Request or Action List might be put on hold.
- Transfer & Reservations – identifies the types of People or Organizations that might possess or reserve a Place or Thing.
Transaction Categories
Transaction Categories are similar to general ledger accounts in accounting systems: they are used to classify transactions for reporting and analysis. It is important to note that some Transaction Categories are automatically assigned by Service Requests (SR) and Action Lists (AL). Currently, these are:
- Parts Expense – automatically used when Items are charged on SR’s and AL’s
- Labor Expense – automatically used when labor time is recorded on SR’s and AL’s
Also, Transaction Categories with a Type of “Fixed Assets” determine if the Capital Expenditure (CAPEX) for the Thing will be updated when a Transaction is entered. In other words, you can have multiple Transaction Categories with a Type of Fixed Assets. Some examples might include Building Equipment, IT Assets, and Furniture & Fixtures.
