Support & Help - Menu Bar
Key Points
- The menu bar at the top of most pages is a way to go to the main functions of the eSSETS app.
- The menu is compressed on small devices such as phones or tablets.
- The settings menu, shown as a gear, allows one to customize the eSSETS application.
Introduction

The menu bar is the entire black bar showing at the top of most pages. Each of the main functions of the eSSETS app is available here. Just click on the one you want, and you go right to it.
The current main function is identified easily by looking for the green oval in the menu bar.
For Smaller Devices...

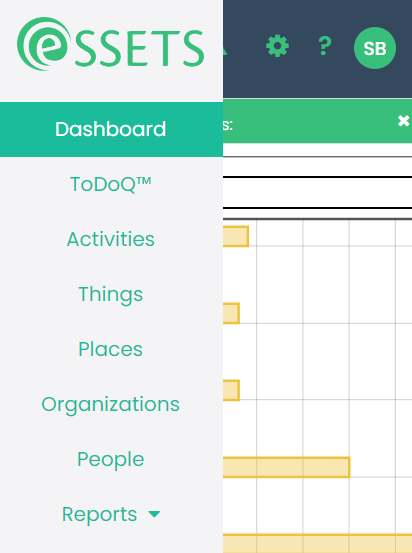
Because smaller devices, such as phones, don’t have enough room to show the full menu, we’ve compressed it for the smaller screen size. Clicking the menu icon on the left (frequently called a hamburger menu because it looks like a hamburger between two buns) expands the full menu downward.
Your Landing Page

Your landing page is where you first go after logging into the eSSETS app. This is the ToDoQ for many people, as it shows a list of open work assigned to them. Managers may be more interested in seeing an overview of progress, which is provided by the Dashboard. They may want the Dashboard to be their landing page.
Whenever you are using the eSSETS app, you can quickly get to your landing page by clicking the big eSSETS logo at the left edge of the menu bar.
Changing Your Landing Page
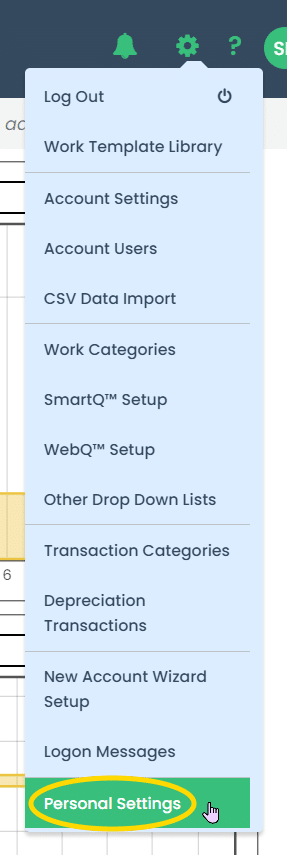
Your landing page setting is one of many available on your personal settings. To go there, simply click the settings icon, represented by the green gear, and choose Personal Settings at the bottom.
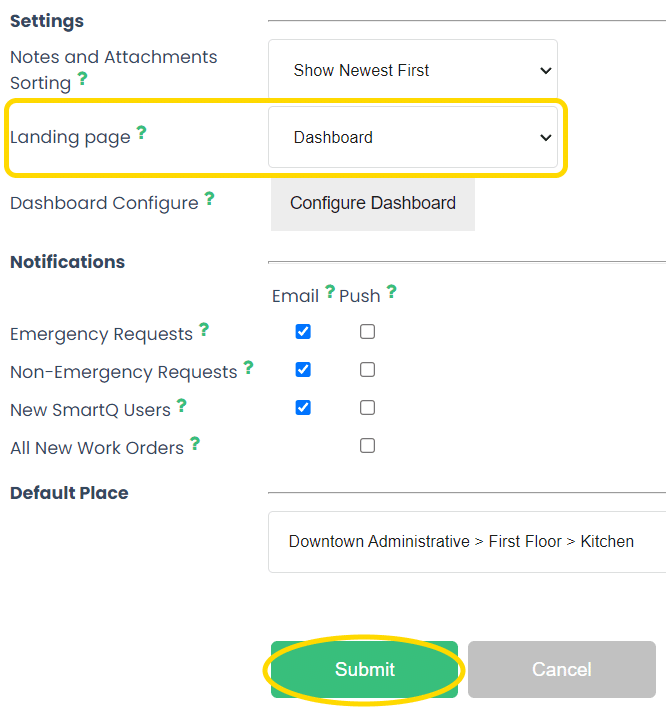
About halfway down the Personal Settings page is the Landing Page setting. Change it as you see fit, and then click the Submit button near the bottom of the page.
Afterwards, whenever you log into eSSETS or click the large eSSETS logo in the heading, you’ll go directly to your new landing page.
Notifications
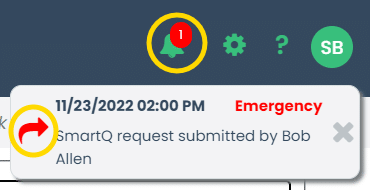
The menu bar shows push notifications if you choose to be notified. This is very helpful for dispatchers, as notifications of new requests pop on-screen within seconds of being submitted.
The Notification icon, represented by a bell, shows a count of notifications remaining to be seen. If there are too many notifications in the way, you can temporarily hide all of them by clicking the Notification icon. The count remains visible to remind you there are still outstanding notifications – only the notifications themselves are hidden. Just click the icon again, and they reappear.
Each individual notification has an action icon to the left. Clicking this icon gets you started on dealing with the issue. In this example, clicking the red arrow opens a work order form so that the emergency can be routed to the appropriate assignee.
If you want to remove the notification without performing any action, just click the grey X on the right side of the notification.

Changing Your Notifications
Your notification settings are some of many available on your personal settings. To go there, simply click the settings icon, represented by the green gear, and choose Personal Settings at the bottom.
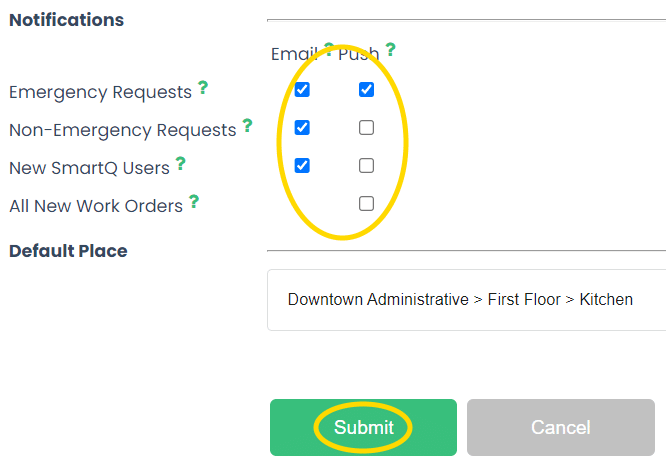
Near the bottom of the Personal Settings page are the Notifications settings. Change them as you see fit, and then click the Submit button near the bottom of the page.
There are two methods of notifications available, the immediate Push notifications shown under the bell-shaped Notification icon in the menu bar, and notifications sent by email. Push notifications are most useful when you are a person who needs to take immediate action as soon as you are notified. Email notifications are helpful as a backup in the event you aren’t using your main computer but otherwise have access to email.
There are four types of notifications available:
- Emergency Requests – SmartQ or WebQ requests marked as an emergency.
- Non-Emergency Requests – All other SmartQ and WebQ requests.
- New SmartQ Users – People who have self registered. Self-registered requesters have permission to see all places, so administrators may want to adjust their settings to the locations pertaining to the individual.
- All New Work Orders – Newly entered work orders, regardless of whether they are dispatched from the IncomingQ or entered directly from the ToDoQ. This probably is most useful for supervisors wanting to monitor how work is being dispatched.
Settings Menu

Each eSSETS customer can customize the eSSETS app in many ways. Clicking the gear-shaped Settings icon gives you the list. In addition, click this icon to log out of the system when you are finished for the day.
Getting Help

If you have any questions about how to do something, help is just around the corner. Click the question mark icon to read about how to use the features of the current eSSETS function.
Who's Logged In?

Finally, the initials of the user currently using eSSETS is shown on the far right of the menu bar. This is most useful for those who share computers, to see whether the last user didn’t log out.
If someone has uploaded an image of your People information, that will show here instead (in miniature).
