Support & Help - People Dialog
Key Points
- The People Dialog is where one views information any person affiliated with your business.
- Information can be added, changed, or deleted by users with adequate permission.
- The available information is: Basic, Contact Methods, Work Orders, Organization, Things in Possession, Attachments, and Addresses.
Introduction
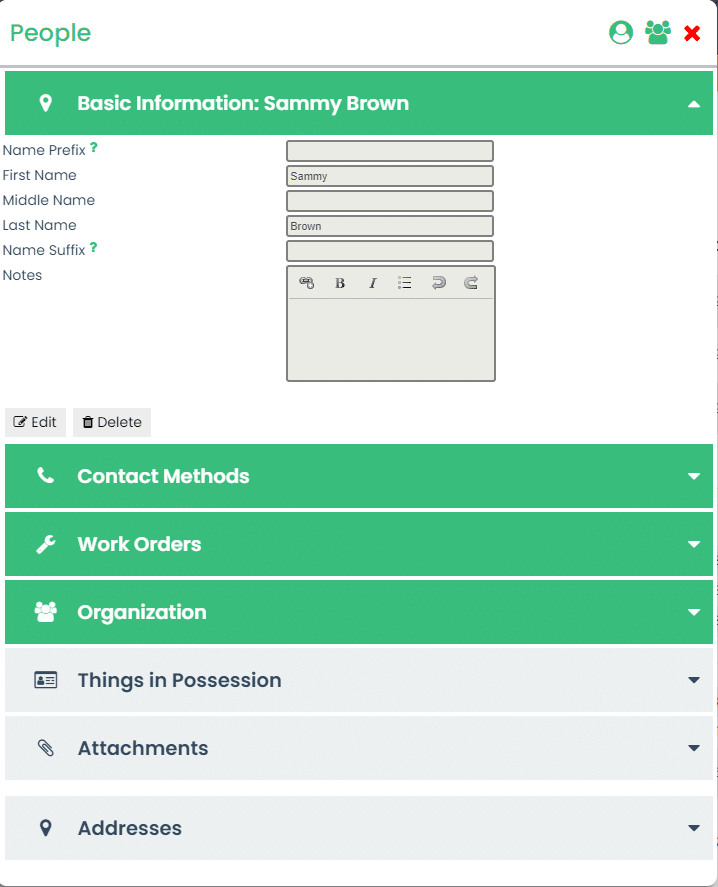
People in the eSSETS app staff fall into these broad categories:
- Staff
- People from outside organizations, such as contractors or vendors
- Other people for whom you want to have information available
For each, there is basic information that is common among them:
- You want to know how to contact them.
- You have their physical address so that you can mail them.
- You might have a picture of them so you can remember who they are.
In addition, there may be other characteristics you’d like to know:
- Have they requested or performed work?
- For what outside organization do they work?
- Are they in possession of any equipment, such as a laptop computer, phone, or keys?
The People Dialog is the place to enter and retrieve all of this information.
Ideas and Best Practices
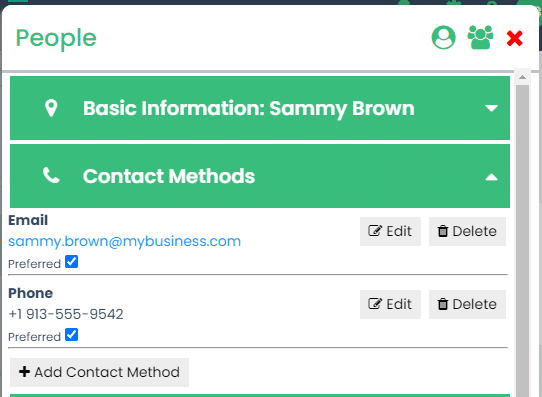
Since the primary use of people information is to know how to contact them, it is a best practice to have a phone number and email address if you have them. Email is the primary method of correspondence when updating people about the status of work being done.
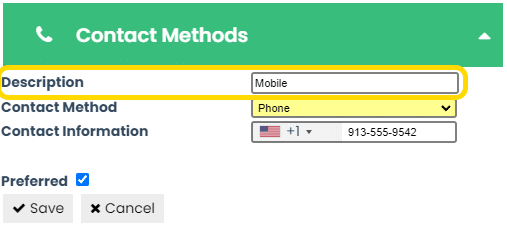
Because people can have several different phone numbers with which they can be contacted, a best practice is to enter a description of the phone number (Mobile, Fax, Work, Home, etc.)
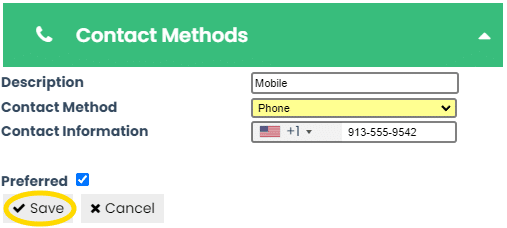
Regardless of the type of contact method (phone, email, website), don’t forget to click the Save button!
General Functionality
This dialog box, as well as several others, work in a similar manner. This section has basic information about the dialog box in general. We’ll follow with more detailed instructions for each section of the dialog box.

The heading of the dialog box provides a red X for closing the dialog as well as other functions that work elsewhere in the app. For the People Dialog, the first of the two icons are for changing this person’s user information related to logging onto the app. Not all people are also users.
The second icon is for merging the information for several people into one. Sometimes a person gets added accidentally a second time, so this is a way for getting all of the information merged back into one.
More details about those two icons come later.
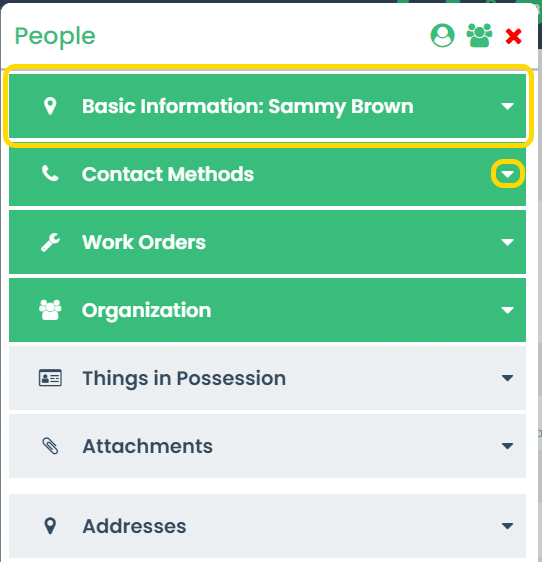
Each of the sections is identified by a big block that has an icon to the left and an arrow on the right. Using the arrow, each section can be expanded and collapsed to reveal the information within it.
Think of each section as being a special form for viewing or changing information of a similar type. Each form operates differently, so we’ll go into more detail about how each functions soon.
Notice that some of the sections are green and others are grey. The green sections have information entered, so you’ll see it when you expand the section. Grey sections, on the other hand, don’t have information yet. Once you add some, it will change to green.
When adding or changing information on one of the special forms, you’ll be prevented from closing the dialog until you are finished with the form. This means that none of the icons in the heading are clickable until you are done. This helps prevent you from accidentally closing the dialog box before you’ve saved the information.
Basic Information Section
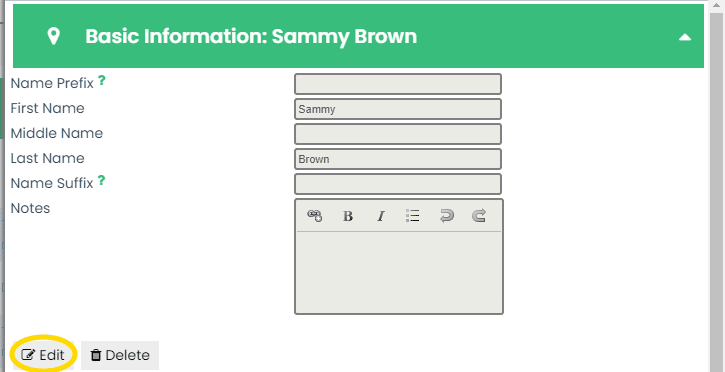
The Basic Information Section is where you enter the person’s name and any notes you have about the person. Everyone needs at least a first name entered.
Click the Edit button to change the information. The two buttons change to Save and Cancel.
If the person no longer has an association with your business, you can delete them. If you later discover you made a mistake, you can also undelete them.
Contact Methods Section
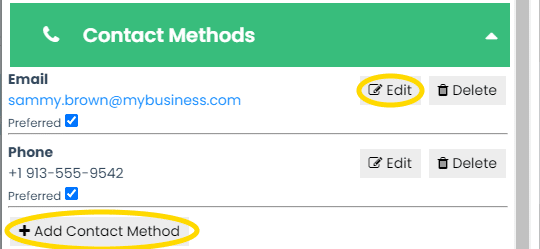
Unlike the names in the Basic Information section, a person can have more than one contact method recorded. Each can be edited or deleted. Unlike the Basic Information section, once a contact method is deleted, it is gone and can’t be undeleted.
There is also a button for adding a new contact method. Clicking it gives you a blank form.

Identify the contact method with the type of method (phone, email, fax, and website) and an optional description. Description is useful, for example, when someone has both a work and mobile phone.
The Preferred checkbox identifies which contact methods to show elsewhere. For example, if you assign this person to work on a work order, their preferred contact methods appear with their name. Also, the preferred email address is used for notifying the person when something is updated on a work order about which they have an interest.
Work Orders Section
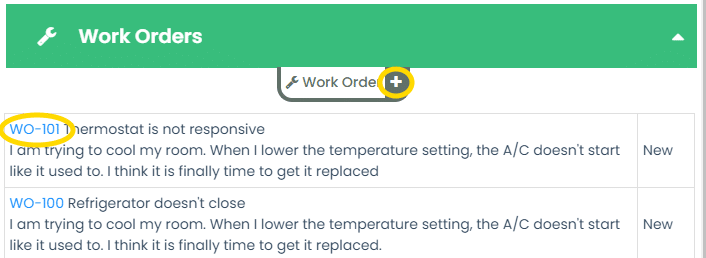
The Work Orders section shows the most recently entered work orders that are associated with this person. For people who are staff, this is work that was assigned to them. For others, these are ones for work they requested. The work order is opened by clicking on the WO number.
Clicking the Work Order plus sign takes one to a blank work order form. If the person is a staff member, they are assigned to the work order automatically. Others are identified as the requestor of the work.
Read more about how to add a work order.
Organization Section

An individual may be associated with one or more organizations. Here is where you indicate the relationship. Just click the Add button to do it.

While adding the person to the organization, you can simply start typing the name of the organization. It will show you a list of matching names from which you can choose.
Alternatively, if you can’t remember the exact spelling, just click the magnifying glass icon to the right of the organization name. This gives you a searchable list of organizations from which to choose.
Although it’s not required, entering the person’s title helps give context about the relationship.

To alter the relationship or remove it, click on the Job Title. You can see more information about the organization itself by clicking on the name of the organization.
Things in Possession Section

Here is a handy place to see company assets that are assigned to this person. This can be computer equipment, for example.
Although one cannot add an assignment from here, existing transfers can be changed by clicking on the Start Date. This is useful, for example, when an employee is terminated and a number of things need to be returned at once.
To see more about thing itself, click the name of the thing to open the Thing Dialog.
Attachments Section
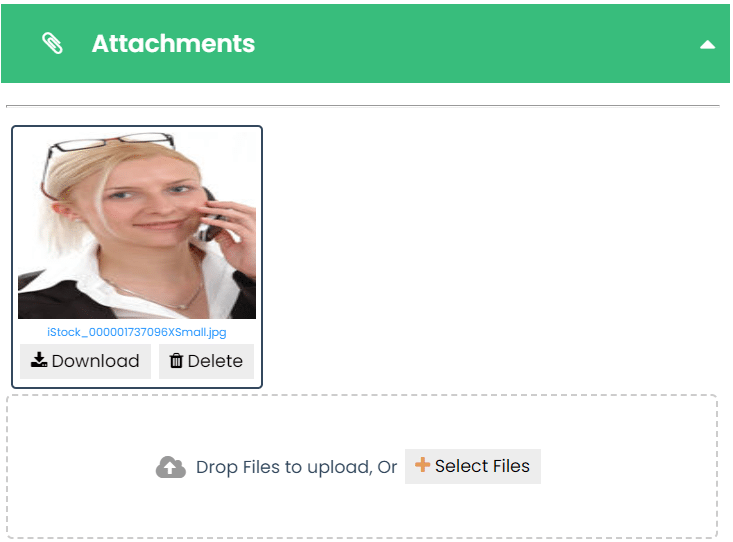
The Attachments Section has photos and documents for this person. The first is the primary attachment, which is used anywhere a picture of this person is shown. An example is the first column of the People page.
There are two methods for uploading attachments. The first is to click the Select Files button. A file chooser normally appears for computers. Many smaller devices, such as phones and tablets, also allow one to use the device’s camera to take a picture or video right then.
The second method, used more often on computers only, is to drag files from one window into the dashed box.
With either method, one may choose more than one file at a time, speeding the upload procedure.
If you want some other picture to be the first, primary attachment, you can reorder the files by dragging them within the list. Be sure to click the Save Order button once they are arranged to your liking.
Addresses Section

There are new changes coming to the Addresses section, so we are waiting to document them until they are ready. They include making addresses easier to copy and paste from another program or web page.
