Support & Help - Places
Key Points
- Places are one of the most important entities in the eSSETS application
- Used for tracking assets and work done at facility locations
- Organized in a hierarchy of broad locations, such as countries and regions, down to the level of rooms or cubicles
- Setup is done by entering it from the Places List or importing a spreadsheet.
Introduction
One of the first and most important tasks for implementing eSSETS is to design your Places hierarchy. The primary purpose of Places is to answer questions related to your locations. Where is it? How do I get there? How big is it? How does it fit in the overall scheme of things? Who is responsible for it? Are there pictures? Drawings? Floor plans? Schematics? What’s it costing me to maintain it? What resides inside of it? Is there anything else I should know about it? And the list can go on and on…
Places Tree Hierarchy Structure
Places are for either a logical grouping or a physical location. Examples of logical grouping might be “Midwest” or “Projects”. A physical location could be a campus, a building, a floor (level) within a building, or a room within a floor.
If possible, try to keep your Places hierarchy to five levels or less. While the system can accommodate more, some of the reporting selections only go five levels deep.
Places List View
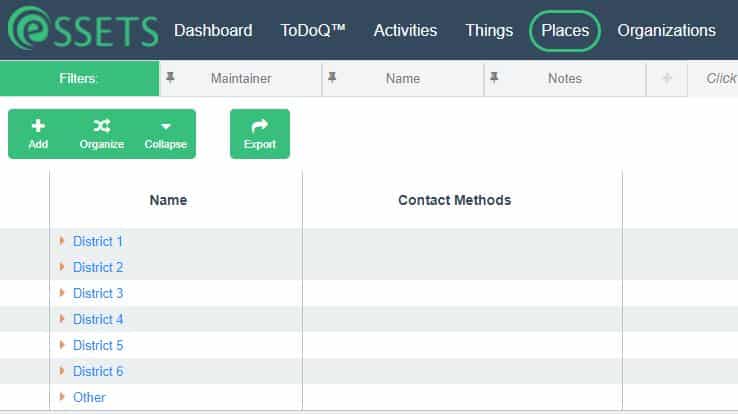
- View the top level of the place hierarchy by clicking Places on the black menu bar.
- Show the next level of the hierarchy by clicking the orange caret icon in front of a place name.
- Continue expanding to lower levels by continuing to click the icon in front of places as they become visible.
- Open the Place Dialog, which shows more detail, by clicking on a Place Name.
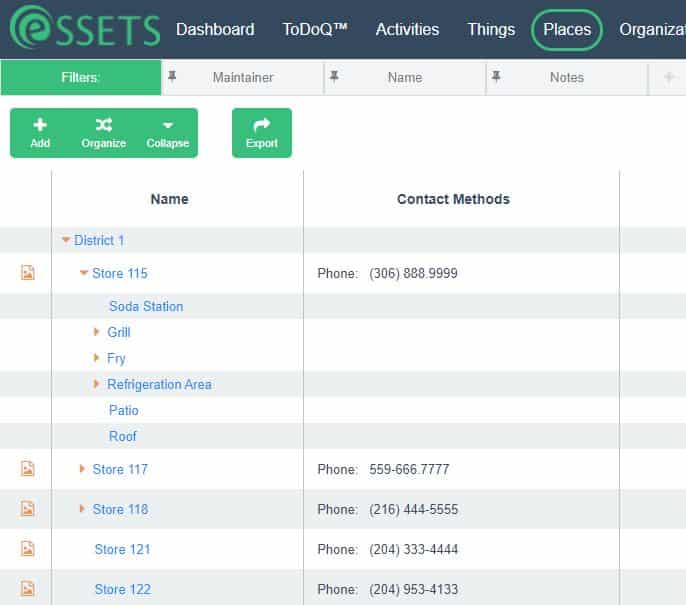
Place List “Drill Down” Example
By clicking the orange icon to the left of the Place named District 1, the district has been expanded to down to the Store level. Clicking to the left of store 115 has been expanded to show the areas and rooms within the store.
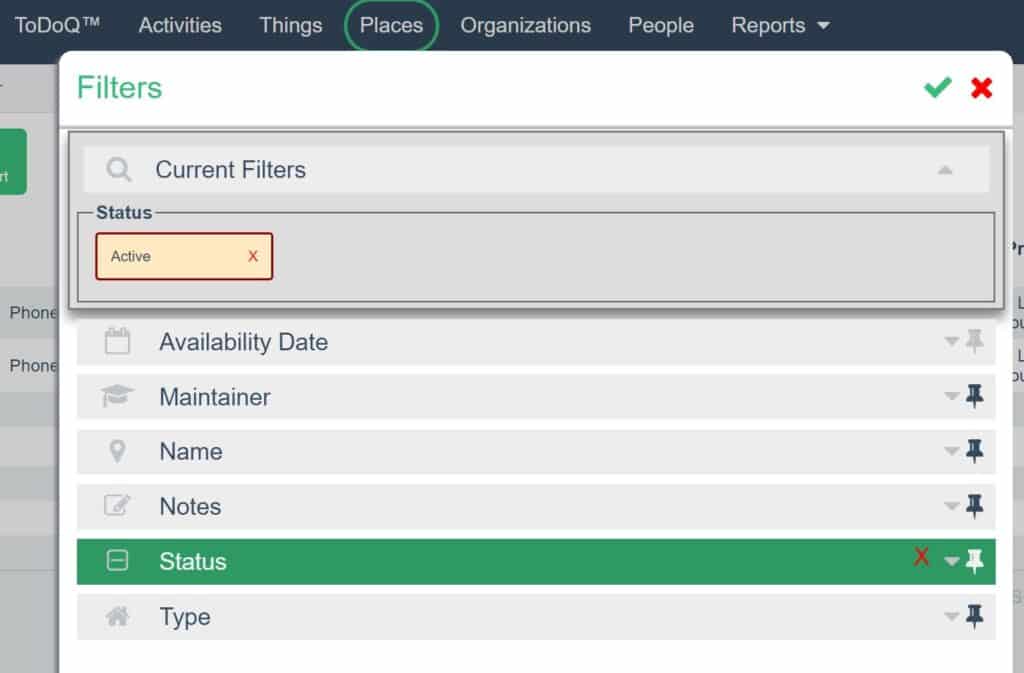
Filtering the Places List
Clicking on the Filters button of the Filter bar opens the Filter dialog box. This shows any currently active filter selections, and allows you to add or remove any of the six available filters. The ones with the black push-pins are “pinned” to the Filter bar for one click access.
Tip – “pin” the filters you used most often to the filter bar. If the push-pin is grey, click it once to activate it.
Place Dialog Sections
The Place Dialog is where information about a place can be viewed or changed. Open it by clicking on any place name, anywhere within the eSSETS application. It contains these sections.
- Basic Information
- Attachments
- Work Orders
- Addresses
- Contact Methods
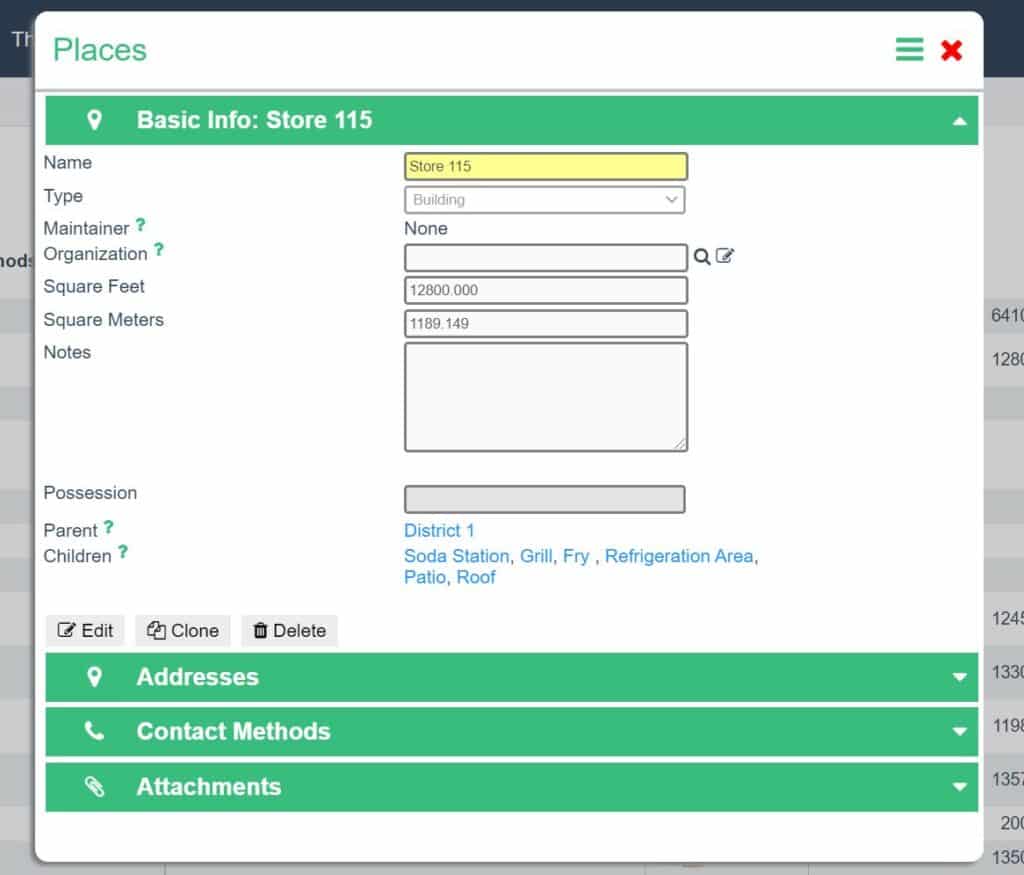
Basic Information
- Type – This is a drop down list with selections that provide a label that can be used for reporting.
- Maintainer – Primary users (not Requesters) can be designated as the responsible person for a Place. A Contractor Organization can also be designated as a Maintainer. A Work Order Task can be configured to assign work to the maintainer whenever an observed condition is outside of a defined tolerance level.
- Organization – This field will only appear if configured to do so from Settings > Account Settings. You may choose to use this to identify Lessors from which a Place (property, building, office space) is leased.
- Square feet/meters – Either square feet or square meters can be entered. Alternatively, if the Place being edited has “children”, you can select the option to calculate the space by “rolling up” the space of its children. Note that you can enter either square feet or square meters, and the system automatically calculates the other for you.
- Notes – This is intended for free format notes to describe the Place that does not fit neatly in its structured attributes.
- Possession – A Person or Organization name will show here if the Place has been “transferred” to that Person or Organization. For example, this could be the person assigned to an office or cubicle.
- Parent – If the Place being displayed is a child, then the name of its Parent Place shows here.
- Children – If the Place being displayed has Children, then they will be listed here. These names are hyperlinked, allowing you to click and open the selected Place dialog.
- Clone – Let’s say you run a chain of restaurants. You defined all the rooms at one of your properties. If other properties are the same, or even very similar, you can save time by cloning the first one. Clicking the Clone button launches a wizard giving you the opportunity to select just which portions of the Places tree you want to copy, and giving you the option of renaming and re-addressing in the process.
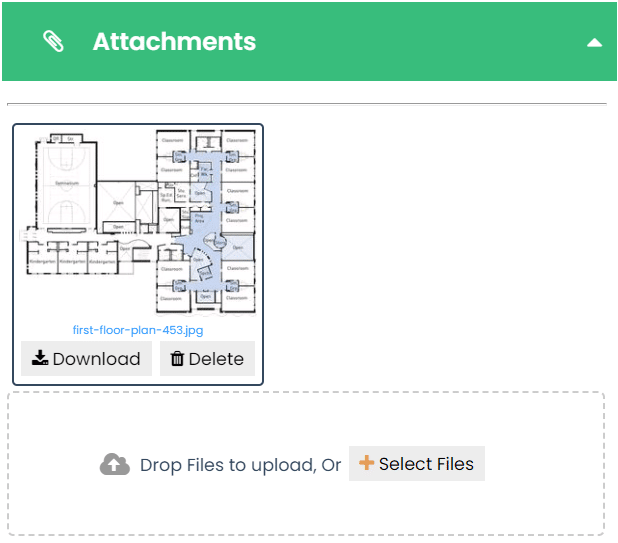
Attachments
While an attachment in itself is not an attribute, it sure can tell you a lot. It can be a picture, a floor plan, a drawing, a specification—about any kind of image or document that provides knowledge about the Place.
Whatever image you attach first is used as a thumbnail in the Places List. The images can be rearranged so the preferred image can be placed first.
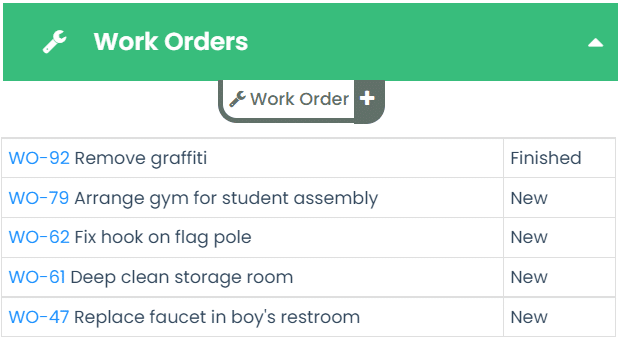
Work Orders
- Shows a list of the most recent work performed at this place.
- Both completed and work yet to be done is shown.
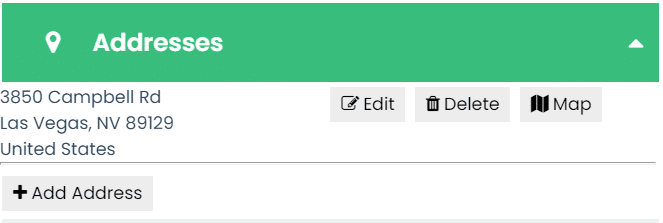
Addresses
- Physical and/or mailing addresses can be entered.
- Geo-Code – Latitude and Longitude can be used for Places that do not have a mailing address.
- The primary address or geo-code is used for providing a link to Google Maps for directions.
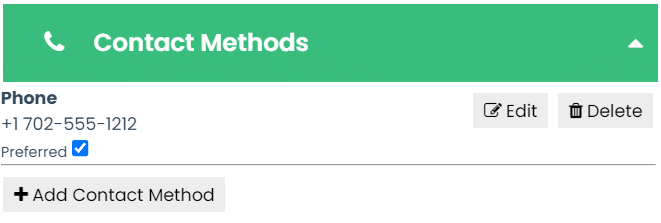
Contact Methods
- Websites
- Phone Numbers
- Fax Numbers
- Email addresses
- The primary contact methods are shown in various reports and forms, including work orders.
Places Action Buttons
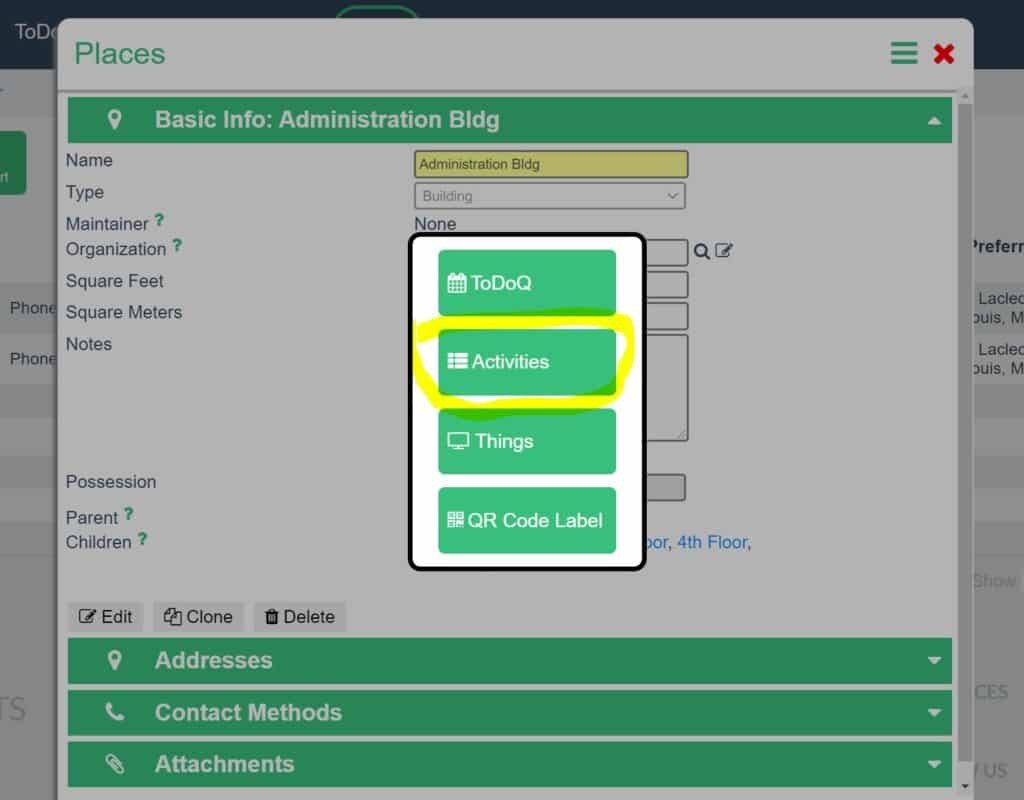
So, you clicked on a Place name. The Place dialog box magically appeared. Besides entering or consuming information displayed therein, what else can you do? Take actions by clicking on one of the Action buttons.
To see the action buttons, click the green hamburger menu in the upper-right of the dialog, next to the red X.
- ToDoQ – This button takes you to a list of open work orders associated with the Place. See the status of everything needing to be done.
- Activities – takes you to a listing of the history of the Place. Entries appear with the most recently completed item at the top of the list. This can include transactions, work orders, attachments, notes, reservations, and transfers. Just about anything that happened to that Place can be recorded as an activity.
- Things – Click to see what things (computers, equipment, HVAC units, etc.) are located at this place.
- QR Code Label – Click this to create a label that can be used to open this Place Dialog simply by scanning it with your phone or tablet. This feature requires a special Zebra brand label printer. Once printed, simply affix the label somewhere in the room.
Tip: If you frequently search Activity history by Place name, you can “pin” the Place filter to the Filter bar of the Activities List.
Place Permissions
The Places tree can be used for controlling permissions—who can see what. If, for example, Sam only works at Campus 1, an eSSETS administrator can set Sam’s permissions so that when he logs in he only sees the subset of Places under Campus 1. He will not be bothered by the “noise” of Campuses 2, 3, 4 and 5.
An administrator can change a user’s permissions by choosing the Account Users item from the Settings menu, which looks like a green gear icon near the upper-right corner of any page.
Organizing Places in the Hierarchy Tree
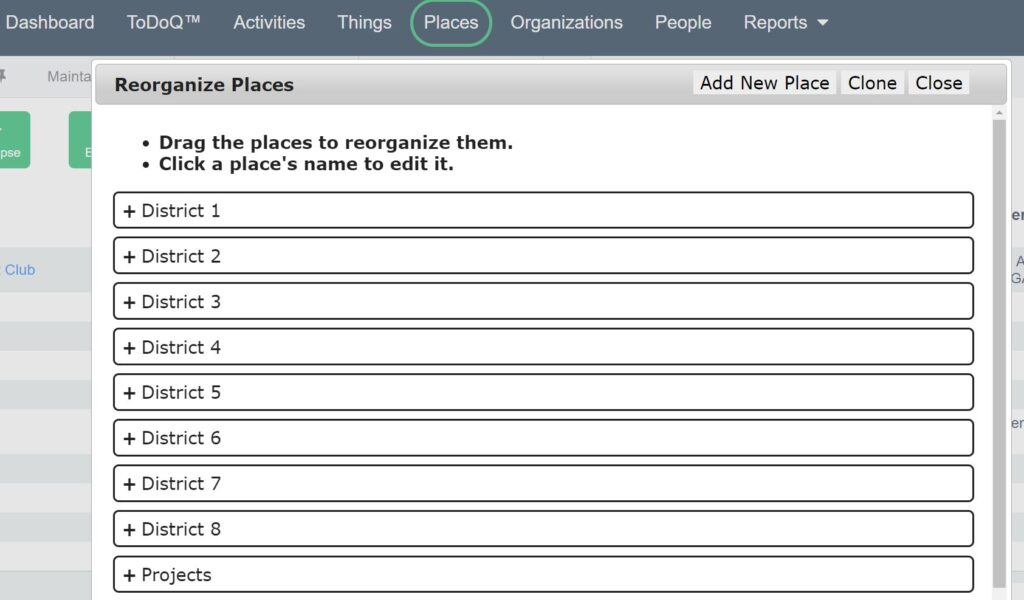
There are different ways you can construct your Places tree. One of those is to click the Organize button at the top of the Places list. This will launch a dialog box allowing you to move Places as you see fit.
- Click the green Organize button near the top left of the Places List
- Show a place’s children by clicking the plus sign next to each place’s name.
- Move a place by dragging the place’s bar and dropping it where you want it.
- Drag by pointing the mouse, keeping the mouse button clicked down, and moving the mouse. This moves the entire bar.
- As you move the bar, you’ll see yellow landing spots elsewhere within the place tree. Let go of the mouse once you have the place dragged where you want it.
- A place can be made a child of another place by dragging it a little to the right of the parent. You’ll see the yellow landing spot shift to the right.
- Dragging can be a little tricky. Don’t worry. If it misses, just start dragging it again. You’ll be doing great after a few times.
Adding a Place
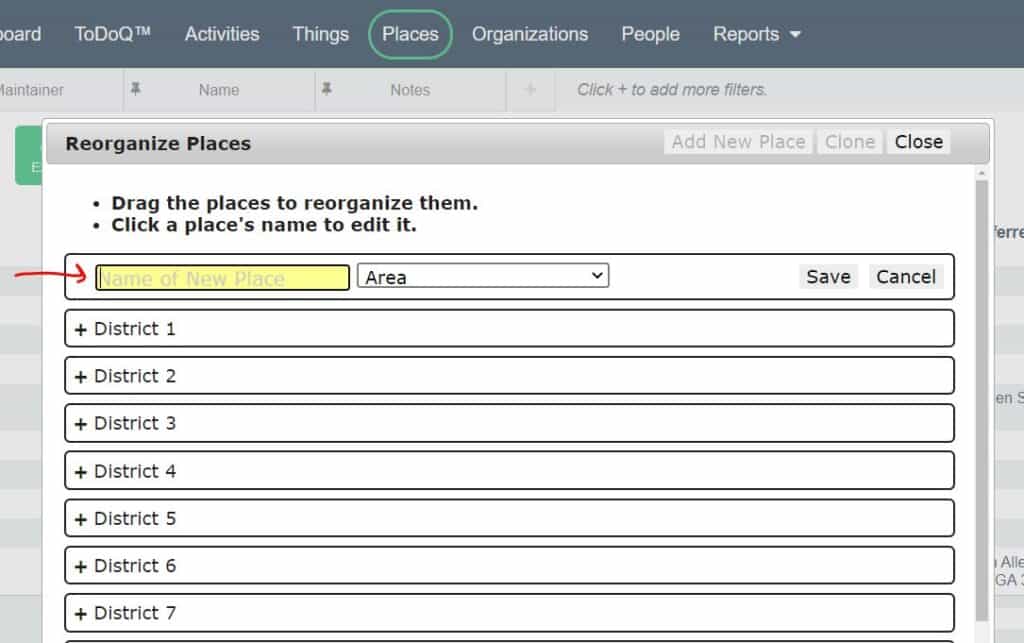
- Click the “Add ” button at the top left of the Places List.
- Name the new place and choose a type from the drop down list.
- Click the Save button, which places the new place at the top of the tree.
- Drag the new place wherever you want it as described a little earlier.
Places Setup Wizard
Another option to help you get Places setup quickly, is to try the green Wizard button near the top of the Places List. This shows a list of Templates containing Place names within tree structures that are common for certain types of organizations. Simply choose one from our growing list of templates, whichever looks reasonably close to your industry.
The Place Setup Wizard steps you through selecting whatever subset of the template you want to use. Afterwards, you can rename the Places to fit your naming convention. Once finished, you can reorganize the list by using the green Organize button near the top of the Places list.
Places CSV Import
Another option to populate your Places tree is to use the CSV Import function. While this is on the Account Settings menu, we recommend you enlist help from the eSSETS support team if you want to go this route. The import is pretty picky. Every column needs to be just right, or you’ll get a list of reasons why it did not complete, sometimes eliciting violent notions towards your computer or others in your vicinity. In the interest of world peace, let us help.
