Override Scheduled Time
When to Use
For businesses who have a lot of staff assignments to shuffle, it may be beneficial to use the available built-in scheduling feature. This gives the dispatcher more information when scheduling the workload for an individual assignee. To add work to an individual's schedule, use the assignee's Schedule icon.
Permitted Roles
- Dispatcher
- Administrator

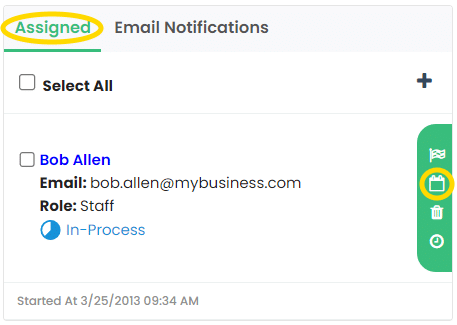
A list of assignees, both staff and contractors, can be seen on the Assigned tab. Click it if it hasn’t already.
Each assignee has a number of icons available to the right of the assignee’s information. Click the Schedule icon, which looks like a calendar, to work with the assignee’s schedule.

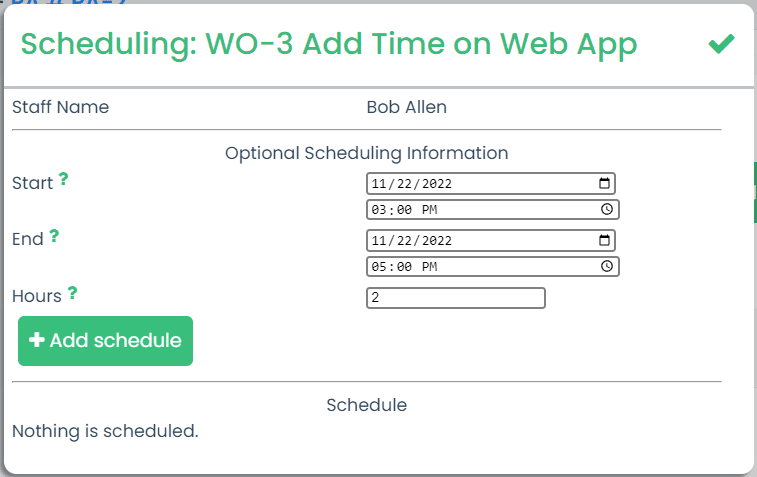
After clicking the icon, a box appears for entering the scheduled time. The bottom of the box also shows any time slots that have already been scheduled. In this example, this is the first time a schedule has been entered for this individual, so it shows that nothing is scheduled.
Enter the beginning and ending dates and times, which calculates the hours, and then click the green Add Schedule button.

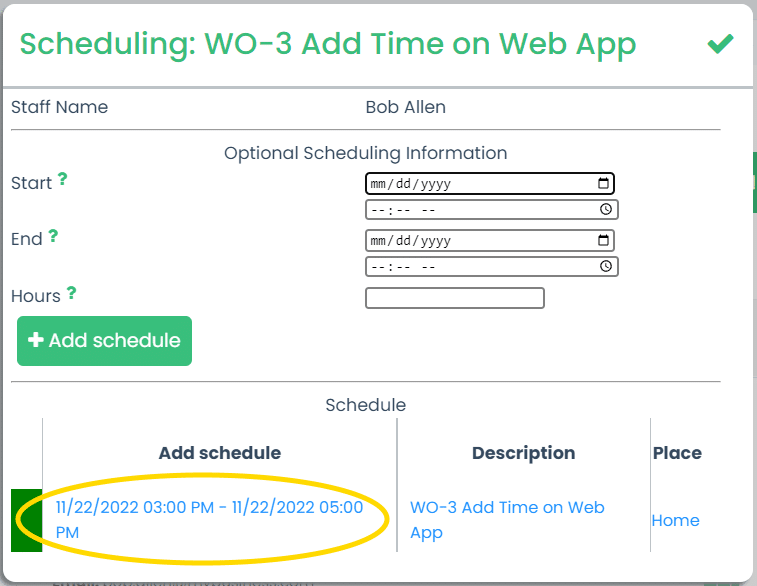
As timeslots are scheduled, they appear at the bottom of the box. This lets you see what is scheduled so that you can find an available timeslot for another work order.
Sometimes you’ll need to adjust the timeslot for a particular work order. This could happen, for example, if more urgent work arises. To change an existing timeslot, just click the link in the Add Schedule column of the list.
You may also decide an assignee should be taken off of a work order in order to free up a time slot. Click the link for the work order in the Description column to open the work order and remove this assignee from the list of assignees.
Finally, each row of the list of scheduled timeslots is color coded. Schedules entirely in the future are coded green. When currently in the middle of a timeslot, it is coded yellow. Timeslots entirely with the past (in other words, didn’t get finished by the scheduled end time) appear in red.
